Pages

Monday, February 28, 2011

First comes the Headboard


I spent Saturday Morning building this.

I learned so many things building A.'s bed that building R.'s bed was pretty much easy peesy...especially this particular headboard.

Then, I spent the rest of the weekend, trying out different mattresses and really thinking about whether or not I want to buy a boxspring with a bed frame or build a platform myself.

After A LOT of thought (yes, I stayed up lying in bed just thinking about measurements, the construction process and the over all time and price of my options...does that make me a true nerd?), I think I have decided to build a platform for the bed. At first, I wanted to make a footboard, but after looking at the very shallow room, I didn't want to give up the 4 inches that the footboard would consume. I also wanted the kids to be able to sit at the edge of the bed like they do in my room.

I then decided that I would build a platform so that I could make the bed much lower than the boxspring and frame combined. E.'s bed was bought at bombay kids and is the perfect height for kids so I plan on building this bed with a lowered height.

Hopefully, what I envisioned for the construction of the bed makes it look both great as well as sturdy. It will have to wait a bit as I am preparing for a HUGE purge of things with an upcoming garage sale. I can't wait to clear out my garage so that I can build things AND park my car in the garage at the same time. Wish me luck.

Friday, February 25, 2011

Board and Batten {Show and Tell}

My never ending project is officially done. I can't say that I will miss painting the walls for the upteenth time, nor will I miss redoing all my mistakes. I have learned a lot, worked a lot, and am completely in aww of what I have created.

I normally describe the how-to's before I unveil the final product, but I simply can't help but show you how the walls turned out first.


Here is what the room looks like right now. I'm not quite sure what furniture I will keep and what will be moving on to a better place.


You can see the stack of bedding that I bought on the chair. I couldn't decide in the store so I bought all of them. The curtains will definitely be swapped out for perhaps something a little more vibrant. I'll also make them longer, just skimming the floors for a more tailored look.


Here's the other side of the room, complete with a chalk board magnetic wall that was created because I ran out of boards and decided to use what I had on hand. I think it was a great solution and simply love the addition. So how do you like the walls? I LOVE love them. I wouldn't do it again because it is so much work to do on your own, but I don't have any regrets making this inspiration a reality for R.

Here's how I did it.


It all started with this room. Excuse the mess. We were clearing out all the Christmas decorations and R.'s room has access to our attic.

From there, R. decided he wanted a blue room to which I painted it this color.


It stayed this way for a year until I couldn't take the color anymore so I decided upon this bluish gray color.


However, it was a little too dark for the space, so it got repainted to this sandy color.


I started the wall treatments by painting the battens. Battens are little sticks that cover the seams of the boards. It is a lot easier to paint them before you place them on the wall.


Next, came the boarding process. I bought sheets of luan because they were rather thin and that allowed me to leave the baseboards on the wall, saving me a lot of time.


Most people would use liquid nails to attach the boards to the wall. Liquid nails is basically material that comes in a tube that resembles glue, but that is as strong as nails, hence the name. I, however, did not want to go this route because I wanted the option to remove the walls if ever I changed my mind. It would not be possible if I used liquid nails because it would rip the sheet rock off. Therefore, I nailed boards to the wall. By doing this, I had to putty the holes (something you would not have to do if you used liquid nails).


Before nailing the boards to the wall, you need to measure and cut out all the outlets. Since the boards are thicker, when you place the covers back on, the outlets are depressed and need to be raised. Therefore, you will need to pull out all the outlets by unscrewing them from the wall and then screwing them into the boards. Make sure you turn off the electricity before you think about touching them. This is spoken from experience. It was quite a shock.


I removed the moulding under the window and trimmed it out with MDF to match the top moulding.


I used caulk to fill in all the spaces and holes.


Then, I added moulding everywhere else. I bought a sheet of MDF and had the store rip the boards for me every 4 inches for the top moulding. I used the scrap piece to make a rail for the chalk.


This is what it looked like after everything was painted.


The final stage was to nail the battens in place.


I placed them every 12 inches apart.


Along the way, I had a few hiccups that I needed to tend to. Remember this?


Using nails, instead of liquid nails, I was able to open up that panel to discover my missing outlet.


Fixing my mistake was a lot easier than what I imagined. Now, my wall looks like this. The outlet is right where it should be.


Do you notice anything else that is different? It was this:


and now it is this:


If you say the wall color is different, ding, ding ding! You are right. I painted it for the third time in three weeks. This is the final color. Third times a charm, right? I love the new darker color. It is a lot cleaner and makes the white walls stand out more.

It was now time to tackle the back wall.


I first used this magnetic primer and painted EIGHT coats onto the wall.


I kept on testing the magnetism. It recommends 3 coats, but 3 coats couldn't hold up an alphabet letter. After 6 coats, small magnets would stay, but nothing more. I added an additional 2 coats in order for R.'s lego magnets to stay up. After that dried, I added a couple of coats of chalk board paint to get this.


Love it.


...and the final result is exactly what I envisioned.


A clean, brighter, and happier room.


Now, it's time to dress it up. I bought my wood today to build the bed. I'm keeping my fingers crossed that this project will be done in a lot less time.

Board and batten - done. One thing checked off...only a hundred more to go. I'm so excited!

Wednesday, February 23, 2011

Chalk Board Wall Inspirations

I'm still working on R.'s room, but the walls are nearly finished. I hope to finish with the wall treatment in its entirety this week. I'm working on the last wall currently. I've been inspired by chalkboard walls. We do have marker boards and chalk boards in nearly every living space and even have an easel so the kids can draw on, but I wanted something a little more permanent in R.'s room.

Here are some inspirational pics:


I love the door, although, I don't know if I will ever have the nerve to do that in our home.


I can totally see the kids going wild with this wall.


I really love this space.


Can't wait to show you what I've come up with as far as our chalkboard wall. It's not this grand, but it definitely is what I envisioned. I will post wall pics when I am done. Next project will be to make this bed. I can make the headboard, but the challenge will be to make it into a full bed, including the footboard and slats. I've done it before, but with no dimensions to work off of this time, this project will be just a tad bit more challenging.

I told my hubby about my inspirational bed I wanted to build and he told me he would buy it for me....but what's the fun in that???...and besides they only sell the headboard and that isn't exactly what I envisioned in that space.

Tuesday, February 22, 2011

every 4 feet, really....

I stood in R.'s room and I mention to my hubby that it seems rather odd that there isn't an outlet on the other side of the wall near the closet. I've learned in the past that builders place outlets approximately 4 feet apart. If that is the case, I'm missing an outlet.


Could I have covered it up with a board? No, I couldn't have done that, could I? After placing all the outlet covers back in place, what do I find? I find an extra outlet cover. So, indeed there is an outlet that has been boarded over.

I rummaged through my stock pile of photos and what do I find? Before I boarded the walls, this is what the room looked like.


and now after the boarded walls...


I blame it on the super bowl. The boys were watching it while I was trying to nail the boards in place on my own. It's very hard to lift a 4x6 feet board and nail it in place on your own. What does that mean for my pretty walls that already have trim nailed on top?

It means that I will have to remove the trim, remove the board, pull out the nails, clean up the caulk, cut out a hole for the outlet, re-nail the board, fill in all the nail holes, touch up the entire board as I am sure there will be a bunch of holes, re-caulk, re-trim, and retouch up. My mistake will cost me heavily in time. Don't you just love renovations???

I could just forget about the missing outlet and call it a day, but my perfectionist mindset just won't let me...so the never ending project lives on...oh, and we were so close to the finish line

Monday, February 21, 2011

Bring on the battens!!!!

I laid out the battens to see if I could avoid outlets and switches, while covering all the board seams. No such luck. Fortunately, the cuts were easy.


Here is a sneak peak since I am not officially done with installing all the battens.


I changed the spacing so therefore, will need to run out and get some more. More wood, more cutting, and more painting... this project is never ending....

My husband asked me the other day whether or not I regretted taking on this very intensive project. Now that I am so nearing the end, it is getting me excited about the next best part of the room, decorating!! However, will need to build a bed first.

Friday, February 18, 2011

Creative solutions

I love happy mistakes. I accidentally didn't buy a piece of board on the back wall. Instead of rushing out to buy one, I decided to use my left over scraps. I had 9 extra pieces to work with. I decided to place one on top of another. However, there was a three inch gap in between.


Therefore, I decided to place two pieces of moulding in between. The 2.5 inch spare I used for the window trim and a 1" scrap that I turned side ways to get the other 1/2 inch. This filled my three inch gap perfectly.


I think it adds a little more character to the wall.


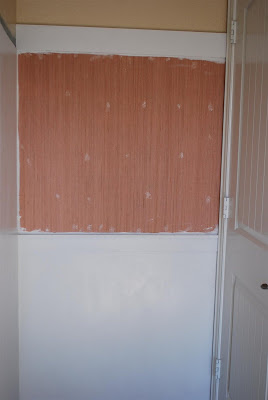
As I stared at that wall, I decided to do something a little different with the top half. I painted the bottom half, but you'll have to wait to see if what I envisioned makes it to the wall. If it doesn't turn out great, I'll just paint it white. Of course, I have to make my life a little more difficult with yet another idea!

I'm am so ready for this project to be over. I'm sure you are tired of reading it by now.

Thursday, February 17, 2011

Moulding!!!

Moulding is cut, nailed and painted. Doesn't it look pretty?


My vision is starting to come to light and I love it. I do admit, I still have 3 pieces of moulding left to cut and put up, but I have to figure out the angles and I am too tired right now to do that. Why can't everything be 45 degrees???


The board seams will be covered by the battens which will have to wait for another day. I am so satisfied with how it is turning out. What do you think?